Cable MIDI pour Carte Son. (Merci ą Nico : nctnico@cistron.nl)
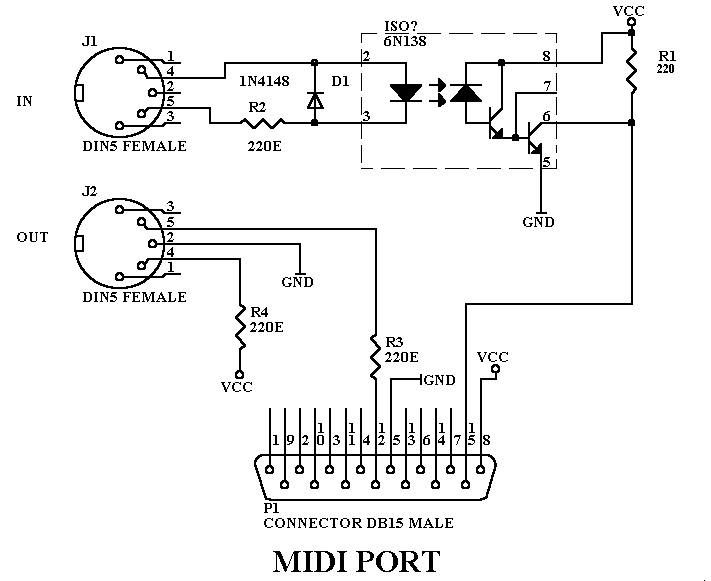
Join me for a walk trough the schematic.
At the top we see...
-J1. Incoming signal-R2. Current limiting resistor
-D1. Reverse voltage protection (static discharge)
-ISO1. Optocoupler 6N138 !-R1. Pull up resistor
Down below you find...
-J2. OUT plug-R3,R4 Current limit resistors
-P1. Connector to the PC's soundcard
All VCCs should be connected together, all GNDs should be connected together.
This circuit can most certainly be build on a piece of pre-printed (and predrilled) PCB. The profs amongst us can design a PCB is they like.
This circuit will fit into a standard sub-d housing. The two DIN plugs can beattached to the circuit by two pieces of cable. If you're setup is fixed(and/or you have easy acces to your cabling), you can even consider mounting2 MALE DIN plugs onto longer cables and plug these strait into yourkeyboard/synthesizer. This will save you two MIDI cables (and some work ifyou've read the other page about making your own cables.)
For compliments, suggestions, remarks or even criticism feel free to email meat the following adress. nctnico@cistron.nl