

Schéma de montage
- 14 réponses
- 6 participants
- 7 924 vues
- 6 followers
DojoD
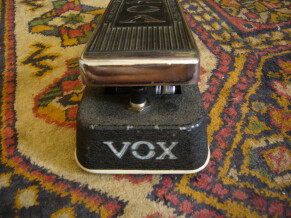
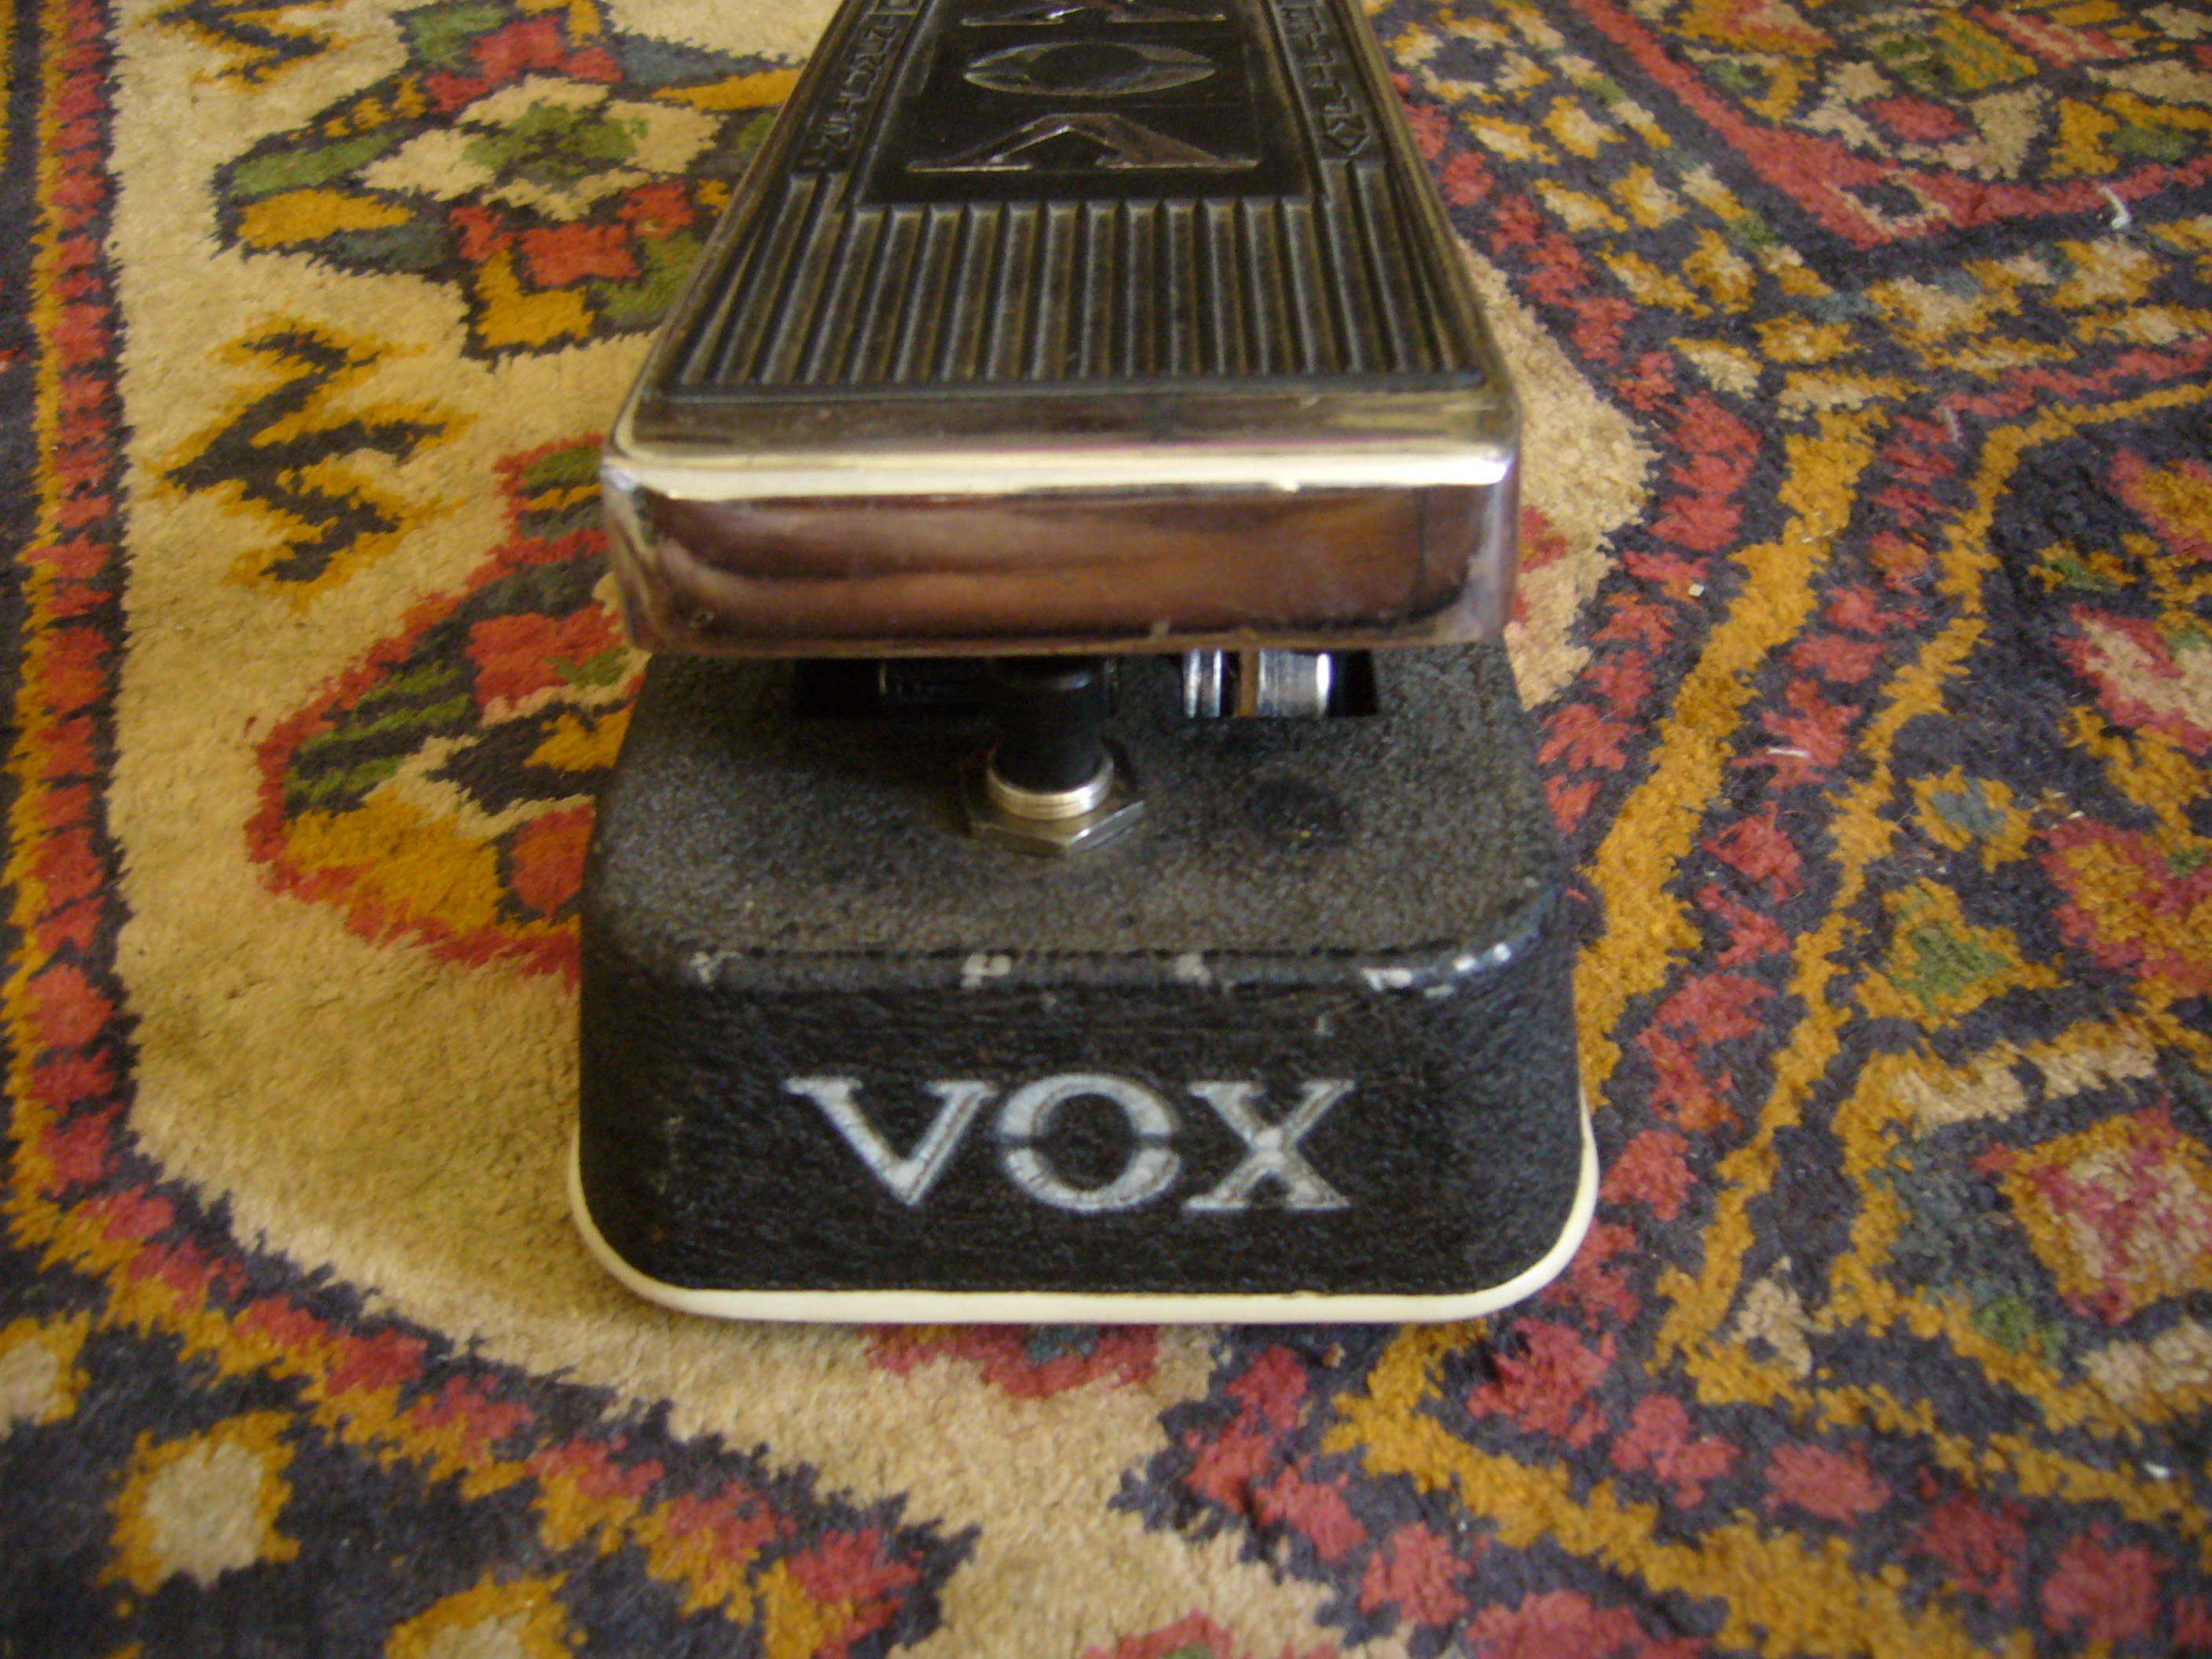
Est-ce que quelqu'un aurait un schéma de montage avec un relevé des valeurs pour les résistances.
J'ai récupéré un PCB de V846 et je voudrais essayer de reproduire le montage.
Ou au moins une photo avec l'ordre d'enchainement des valeurs serait top ! J'y comprends pas grand chose aux schéma d'électronique en fait...
Merci !
- 1
- 2
redpill
enfin un post intelligent et interessant au milieu de tout ces conneries de "vintagerie" et de "mojo" . benoitxvii tu as tout bien résumé aussi bien la vérité sur les composants que les betises et autres arguments fumeux des vendeurs et "fabricants boutiques" !
Si tu as l'ocasion de mettre tes schéma sur free, je serais ravis d'y avoir accés (il y a surement des trucs que je n'ai pas).
Un truc aussi a faire sur les wah (si on ne devait ne fait qu'une modification ce serait celle là) c'est le changement du condo de 10n , le "sweep cap" responsable de la fréquence, pour une valeur supérieur autour de 22n, ca déplace le filtre dans les graves et on gagne en rondeur .
rumorofsmoke.github.io/
benoitxvii
Bon, j'ai retyrouve , alors je rajoute:"La Vie Secrete des Potentiometres"
du meme gars, vous avez les references, et vous aurez les schemas qui vont avec
The Secret Life of Pots
Copyright 1999 R.G. Keen All rights reserved.
As electronics tinkerers, we all use potentiometers, or "pots" for short. We count on them to control all our musical gear, and quite often get frustrated by their limitations. As in all relationships, a little understanding goes a long way. Let's take a look at how pots work so we can use them better.
Back in the dim reaches of electronic prehistory when electricity, let alone electronics, was poorly understood , a number of researchers were trying to figure out how this mysterious force worked. They had no meters, no oscilloscopes, not even very good batteries, and had to literally make their own parts to get anything electrical to work. In this era, a fellow named Ohm settled a controversy. There was general agreement in the electrical research realm that the ratio of a voltage to the resulting current in any chunk of material was dependent on the material itself and the value of the current raised to some power, or
V=k * I^x
The raging discussion was over the value of x. There was general agreement that the value of x was something odd, 3/2 or 4/3 or some such value, and the electrical intelligentsia spend a great deal of work trying to measure this value ever more precisely. Ohm astounded his fellows by proposing that the value of x was simply one, not some odd value. For this work we remember him every time we use Ohm's law, that the voltage across any resistor is equal to the resistance times the current through it.
The reason I brought all that up is that the resistors and controls that were common in Ohm's day were very crude, simply bars or strips of some resistive material, often carbon or charcoal. To get a variable voltage, Ohm and his colleagues would impress a voltage across a length of resisting wire or carbon, and touch the conductor part way along it to obtain a voltage intermediate between the voltages at the ends of the resistor. As you might expect, this sometimes led to sparks and burned fingers.
Despite all our sophistication, we still do that with our pots. They all work the same way, a contact sliding along a strip or coil of resistive material. Let's have a bit of boy-genius fun - let's tear one open to see what makes it tick - then we can compare to Ohm's variable resistances.
The following picture is representative of how modern pots are built. I used a carbon composition pot made by Alpha, a linear 10K, 25mm diameter control.
To get inside it, you notice those little metal tabs bent over the housing on the top? I took a fine bladed screwdriver and bent them up....
When they're all bent up, you can lift the shaft and phenolic wafer assembly out of the back housing like this.
All the fun stuff appears to be inaccessible under that black plastic cover. Actually, that cover performs a couple of very useful functions; it serves to hold the wiper in place, and also interacts with the stop on the case to set the mechanical rotation limits. If you remove the tab on the plastic disk and reassemble the pot, it will now rotate freely 360 degrees. Here's a little better view of the shaft/wafer/wiper assembly.
Looking closely, you can see that the shaft is held onto the plastic disk by being mechanically squashed into place. That is quick, and makes for cheap pots, but it can't be removed and successfully reassembled. That is a peculiarity of this brand, as some pots can be disassembled and reassembled successfully. In the next picture, I've used a big pair of diagonal cutters to remove the plastic disk and the metal wipers. This exposes the bare conductor assembly.
The whole works of the pot, excepting the rotating wiper are printed on the phenolic wafer. The connections to the ends of the resistive material are a conductive metal material, as is the circle of conductor that connects to the center contact. We can now begin to see our control's kinship to Ohm's variable resistors. The resistive material is a circular band of carbon-containing gunk that is printed onto the phenolic wafer, overlapping the metalization to the two outside lugs at either end. The wiper is just a sliding bridge from the center metalization ring to the outer resistive ring. The contact to the metalization is fairly reliable, but the contact to the resistive ring may be intermittent, so the connection to the outer ring is made by three contacts in parallel, as shown by the three tracks the contacts make in the top of the resistive material. Those gouges and scratches are a product of the delicate manner in which I removed the plastic wafer, so ignore those.
With this view, a couple of things fairly leap out at us. This is a linear pot, which is exactly what we should have from a continuous, homogeneous strip of resistive material. That is to say, the wiper traverses an equal amount of resistance in ohms per degree turned. If we wanted to make a non-linear pot, where the amount of resistance per degree turned were not linear, we could mess with the resistive strip to make it nonlinear. This is in fact how it's done. The strip can be made to get skinnier toward on end or the other; a narrower strip has more resistance per unit length and so the resistance per unit degree turned will change. This is not desirable from reliability reasons, as we'd still like to have three contacts to the resistive strip, and that isn't possible if the strip gets skinnier. We could also change the thickness or composition of the material from one end of the resistive strip to the other.
It turns out that printing a varying thickness is very difficult to do cheaply. Also, varying the composition in any kind of smooth fashion is very hard, not a repeatable manufacturing step. What makers of pots actually do is to use straight-line approximations to a nonlinear resistive curve, and print in sections. For instance, the first 1/3 of the circumference of the pot's resistive band may be printed with one resistive material, the second another, and the third yet another. This allows the maker to come reasonably close to some taper curve.
Other things are that we can see the way pots wear out. The wiper literally wears a path through the conductive strip. When all three contacts get all the way through, they don't make contact any more, and the pot quits functioning. During the normal life of the pot (that is, the wear-out process) the bits of resistive material gouged and work from the resistive strip stay around and can actually lift the wipers from the resistive strip. If there is a DC voltage across the pot when this happens, the wiper loses and then regains contact at a different DC level than it left, so it makes a scratch or click.
Pots used to be made with taps part way around. This was just a fourth terminal connected to a strip of metalization running under the middle of the resistive material part way round. The metalization on the ends that the wipers touch when the pot is turned all the way to one end or the other can be extended further around the path of the resistive band so that the resistive band can start later in the pot's mechanical rotation and/or end sooner. The maker can print metalization "dead zones" in the middle of the rotation where nothing much happens resistively. It's very flexible.
Tricks you can play
This simple structure means that there are lots of non-standard things we can do with pots.
if you have a brand of pot that can be reassembled, you can swap wafers between pots to repair a broken or worn out one
if you have a dual pot body, you can assemble custom dual pots with wafers from other single pots of that same brand
if you have to repair a pot and don't have another wafer, any connection you can make between the two disconnected sections of pot will work
you can bend the wiper contacts sideways to let them contact new, unworn areas of resistive material
you can bridge over breaks in the resistive material with copper or silver conductive paint, or make a custom tap point
I have heard that you can use copier toner dust to melt over a section of worn resistor material and repair it.
You could hypothetically scrape material off the resistor band and make a higher resistance, odd taper pot, but there are better ways to do that.
MBA's, Stock Pots, and Resistors.
There is an affliction loose in the business world that I call the MBA Disease. Old timers will recall a time when Radio Shack was really a place to get electronics parts. Radio and TV repair places had electronics parts, and distributors had a large variety of odd miscellany. You could usually find parts, even if they were not hot sellers, because the parts suppliers ordered a range of parts that they thought would appeal to their customers, and kept stock items because they were useful, even if they didn't sell for a long time.
Enter the MBA. The creed of the MBA is that everything I have in my business should be making the best return on my money *right now* and *continuously*. If some item I'm selling is not returning as good a rate of profit as some other things, I can make more money be not selling the less profitable items and concentrating on only the things that are hot sellers with high rates of return. This does work. Businesses that adopted it were more profitable than their slower peers were, and in many cases the slower peers went out of business.
These are the seeds of destruction for the electronics tinkerer, though. A lot of times tinkerers want devices that are not used in millions. This means that increasingly, it's almost impossible to find odd values, odd tapers, or unusual terminal arrangements in pots. Reverse log pots have always been a specialty item, but it's getting hard to find ordinary audio/log taper volume pots, and values that are not decade multiples of 1 or 5K are getting rare. Distributors will not stock pots that aren't high sellers; this leads to some self-fulfilling prophecy. Eventually, the manufacturers note that odd value or taper pots are not selling - pesky distributors don't order them anymore - and they quit making the odd ones. This leaves us where we are today. The manufacturers have gotten good at making a run of 10K of any pot value, any lead/leg setup, any taper, and any case. They'll happily make whatever you want, if you want enough of them. The few of us that hand solder stuff together have to make do with whatever the distributors do order. And today, that is increasing only linear pot, maybe a few audio tapers.
Which leads us to tapering.
What is taper? It's just the ratio of the resistance already passed as the pot turns to the total resistance of the pot, described as a curve. For instance: we want to make a variable power supply with an adjustment pot that smoothly varies the voltage from one to ten volts, so we want a control that lets us do that. We have no idea whether we'll want mostly low voltages or high voltages, so we want to adjust it equally well anywhere in the range. In this case, it's most natural for the control pot to have an equal change in resistance or voltage divided per unit of rotation - we want the control to feel linear. This much of a turn is one volt, no matter whether it's near 0V or near 10V.
Volume controls are different. The human ear does not respond linearly to loudness. It responds to the logarithm of loudness. That means that for a sound to seem twice as loud, it has to be almost ten times the actual change in air pressure. For us to have a control pot that seems to make a linear change in loudness per unit of rotation, the control must compensate for the human ear's oddity and supply ever-increasing amounts of signal per unit rotation. This compensating resistance taper is accurately called a "left hand logarithmic taper" but for historical reasons has been called an audio or log pot. In these pots, the wiper traverses resistance very slowly at first, then faster as the rotation increases. The actual curve looks exponential if you plot resistance or voltage division ratios per unit of rotation.
If you used an audio/log taper pot for the control of the power supply we mentioned, the output voltage would increase very slowly at first, creeping up to maybe 10% of the final output at 50% of the pot rotation. It would then blast the other 90% in the last half of the rotation - very hard to control. Likewise, if we used a linear pot for volume control, the volume would come up dramatically in the first half of pot rotation, and then do very little change in the last half.
The dark horse taper is reverse audio, or more strictly "right hand logarithmic" taper. This taper traverses resistance very quickly at first, then more slowly as it is turned further. It's the inverse of the audio taper. This is used in some bias circuits and in controlling the speed of certain RC oscillators, which is where the audio tinkerer runs into it most.
The following diagram shows the three main kinds of pot tapers, along with one common approximation to an audio taper. Curve 1 is linear taper. If we clip one lead of our Ohmmeter (Hey! There he is again!) onto the leftmost lug, and the other lead on the center lug, then the resistance we read as we rotate the pot clockwise will fall on the curve that goes diagonally upwards. The proportion of the total pot resistance we traverse as we turn the pot is linearly proportional to the amount of rotational travel we turn.
Curve 2 shows what happens with an audio or logarithmic taper. As we turn the shaft, the proportion of resistance we traverse increases slowly at first, more slowly than the percentage of rotation. As we get past half the available rotation, the rate of resistance traversed speeds up as we get closer to the furthest rotation. This compensates for the human ear by increasing sound levels very slowly at first, then faster as the ear's sensitivity falls off at higher sound levels.
When we buy "audio taper" pots, we usually get something like Curve 3. For less expensive pots, manufacturers use a two or three-segment approximation to Curve 2. It's not perfect, but it usually works OK. Curve 4 is the typical resistance versus rotation curve for reverse log pots. In real life - that is, if you ever found one of these in real life - it is usually a two or three segment approximation, too.
If you have an unknown pot, you can figure out what taper it is. You measure the resistance from end to end, then turn the pot exactly to half its rotation and measure the resistance from the counterclockwise lug. The crosses on curves 1, 2 , and 4 show the most probable values. If the resistance is 50% of the total resistance, then the pot is linear. If you measure only 10% to 20% of the total resistance, the pot is an audio taper. If you measure 80%-90% of the total resistance, the pot is a reverse log taper.
At this point I should probably explain what a counterclockwise lug is. Of the three contacts on the pot, the wiper is easiest to pick out. If you turn the shaft fully counterclockwise, the wiper lug will show very small resistance to one of the other contact lugs. This is the counterclockwise or "cold" terminal. Turning the shaft fully clockwise, the wiper will show very small resistance to the most clockwise lug, also called the "hot" lug.
There are other tapers, but they have very specialized uses.
Our problem is this: If we need a specialized taper to recreate some effect, how do we get it if we can't go buy one? That leads us to tapering resistors.
If we set up the easiest, simplest pot to get, a linear taper pot of resistance R, and then connect a "tapering resistor" across the wiper and CCW lug, we get the situation shown in the following diagram. For clarity, I've separated the resistance above the wiper and the resistor below the wiper into two separate resistors. It makes the calculations much easier.
We're assuming the total pot resistance R is split into an R1 at the CW side and R2 on the CCW side, with R3 paralleled with R2. We'll let "a" represent the fraction of the total resistance R that the wiper has turned, and "b" be the fraction of R that R3 is. When we get out the algebra books and do the math, we find out that we can show that the ratio of output voltage to input voltage is that odd looking fraction in the picture. When we calculate out the results, we find that the divider ratio of Vout to Vin is shaped something like a true logarithmic tapered pot if we pick the right value for b. If b happens to be 1/4 to 1/5, the resulting voltage division is remarkably close to a true logarithmic pot, probably closer than a two segment approximation that we could buy! Wow! No more waiting for volume control pots!
Here's what we see when we do the math:
Unfortunately there's a gotcha in there. It's true that the voltage division ratio of this rig is arbitrarily close to that of a log taper pot. However, neither the load seen by whatever drives Vin or the source resistance as seen by the input of whatever is connected to Vout is close to what would exist for a real log pot of value R. In fact, the load on Vin varies from 1/(1+1/b)*R up to R. That means that if we're trying to do a log taper with b = 1/4, the load on Vin will be as much as 0.2* R. This may be OK, but you have to keep it in mind.
In general, if you have a voltage source that can drive a load of 1/4 to 1/5 of R and a load on Vout that has an input impedance much higher than that same 1/4 to 1/5 of R, this is a good replacement for an audio or log taper pot.
In a bit of good fortune, if you hook up the tapering resistor from the CW or hot side of the pot to the wiper, the pot emulates a reverse log pot, just as well as it did a log pot when hooked to the CCW side.
There are two ways to hook up a pot. You can hook it up as a three terminal voltage divider as we've seen above, or as a variable resistance, the two-terminal connection (sometimes called a rheostat connection for historical reasons).
In the two terminal connection, the resistance through the pot is what we're interested in, not the voltage divider ratio.
It turns out that the tapering trick works here, but only partially. If we want to make a reverse log tapering pot, we're in! However, there is no way to get a simulation of a log taper pot in the two terminal connection. For that we have to buy real audio taper pots.
Here's what you get if do the series resistor connection:
Note that the CW terminal is unused. This is usually tied to the wiper, although that is not seen here. You can't simply put the tapering resistor from the CW terminal to the wiper and get a log taper pot emulation, like you could with the voltage divider connection. That just gives you the reverse of this graph, with the resistance starting to decrease slowly and then faster. The two terminal connection is non-polar; it looks the same however you hook it up. The only thing that changes is which end of the graph you start from.
In the math examples I left b, which is the fraction of the pot resistance that the tapering resistor is, as a parameter rather than making it a fixed ratio. Usually, people pick a value of b of about 4 or 5. Those curves are close to the classical mathematical description of a log or reverse log pot. I left b a parameter to show you that you can make your own taper by selecting a different value of b. For a semi-log taper, use a b of about 2.
I'm tired of typing. I'll put in more later. As always, additions and corrections are welcome. Send'em in!
benoitxvii
Retrouve!!!
l'article sur l'influence des selfs, leur valeur, leur technologie et la qualite des composants sur le son resultant
Mais ce coup ci, c'est en espagnol........!!...Youpi!!!!!
mais la lecture vaut franchement le coup!
Un merci et un bravo a l'auteur
On a la aussi un exemple de la c..............(vous saurez completer?) humaine, au niveau du pipeau "c'est ancien, c'est meilleur"(ce qui peut sembler vrai,, mais c'est plutot un probleme de qualite de fabrication
Ex: les potars
je cours apres les bons vieux Allen-Bradlay, Type J Audio, etanches, "tropicalises(trempes dans un vernis ou une resine, ca bouche toutes les petites fuites) dissipation suivants modeles2Watts, 4Watts, 5Watts, pistes ceramiques, curseurs genre 8x3x10 mm en graphite ,tenu par un ressort maousssss costaud, capots metalliques, cosses pour cables plaquees or.....
Ici, je les ai payes il y a 20 ans dans les 35F pieces, puis 200F piece, puis 40€, voir 70€, et on en trouve plus
Indestructibles, faits pour durer 20 ans
composant qualite militaire
J'ai trouve l'equivalent, deux marques canadienne
qualite militaire, dissipation 2 et 4tts, une qualite de fabrication qui a l'air d'etre au niveau des Allen Bradley1__Alessandro
excellents, mais CHERS! tres chers !!40 a 70 €
2__PEC idem, mais moins chers
pour ampli, 9.5$, pour guitar,, avec axe fendu et rainure, a peu pres 40$, j'en ai vu a 20-25$
Les russes et autres pays de l'est nous ont approvisionnes en composants de qualite introuvables ici,,comme condos aux polypropylene, teflon(!!!), verre(!!!!!!!), PIO(paper in oil, mais bien regarder et lireles caracteristiques, sinon parfois, mauvaise surprise) mais il se sont rendus compte que nous faisions des affaires, ils ont augmente leurs prix, jusqu'a ce que ce ne soit plus interessant pour nous, colte monnaie, et aussi parce qu'ils essaient de fourguer n'importe quoi
Il y a encore de bonnes affaires, mais c'est de plus en plus rare
Bon, fin du bartatin, je vous met l'article de PISOTONES Allez sur leur site, vous aurez tous les schemas et photos
Tri-Wah
Este es un proyecto que llevo mucho tiempo intentando llevar a cabo. Había dos cosas que me echaban para atrás con él pues a pesar de ser electrónicamente un circuito sencillísimo, tenía dos problemas que eran muy difíciles de solucionar. Afortunadamente ambos se han podido solucionar y de un modo muy satisfactorio.
El primer problema era el del inductor. El que no sepa de qué se trata, es una "bobina" de hilo de cobre bobinada alrededor de un núcleo de "ferrita". Hasta aquí la cosa no es nada grave, excepto por el pequeño detalle de que hablamos de una "inductancia" (valor en el que se miden los inductores) muy alta, alrededor de 600mH ("miliHenries"). Todos los inductores que se venden comercialmente son de valores mucho más pequeños, en el orden de microHenries, esto es la milésima parte de un miliHenry. Si bien las inductancias se suman cuando pones los inductores en serie, como las resistencias, la cantidad de ellos que tendría que encadenar para conseguir el valor adecuado era enorme y no era posible en la práctica.
Había, cómo no, la opción de comprarlo en la web en alguno de los sitios que te ofrecían repuestos para los pedales originales, pero aparte de caer en el viejo truco del "mojo" (magia) que pretenden colarte estos señores, eran carísimos.
Al poco descubrí que había un tío que había escrito un artículo desmenuzando los pormenores del pedal. ¿a que no os imagináis de quién hablo?.... ¡como no!, de nuestro ubícuo amigo R.G. Keen y su espléndida página acerca de The technology of Wah Pedals, extraordinaria página en la que se desvelan todos los misterios de estos pedales. En ella se indicaba cómo sustituir el inductor por un pequeño transformador de impedancias de "Radio Shack", cosa que tampoco me sacaba del atolladero, pues no se venden aquí.
Afortunadamente, al poco encontré que en RS-Components vendían inductores con muy buena pinta de 100mH, lo cual me facilitaría mucho el tema, pues con 6 ya obtendría los 600mH necesarios. Si queréis verlo, id a RS-Components y en buscad por "Inductor 100mH" o por el código "228-371". En la foto que veréis es exactamente el de enmedio, para lo que deberéis seleccionar la opción de mostrar los resultados en imágenes. Los de 100mH cuestan 1.47€ + I.V.A. (Febrero 2002).
Desgraciadamente quedaba lo peor... ¿de donde saco un pedal de expresión donde meterlo?. Leyendo el artículo de R.G. Keen veo que en los wahs convencionales, el pedal acciona un potenciómetro logarítmico de 100K... ¡ caramba, qué casualidad ! igual que en los "pedales de volumen" que venden por ahí. Luego recordé que yo tenía uno, con lo que sólo me hacía falta conseguir los inductores para probar que tal.
Decidí darle una pensada un poco mayor al tema y me estuve informando acerca de construirme mi propio inductor. Afortunadamente tengo un polímetro con medidor de inductancias, por lo que podría saber si el resultado era bueno. Conseguí un núcleo prácticamente idéntico al que llevaban los originales y, mediante un trabajoso bobinado en mi torno conseguí un resultado bastante pobre. Sólo obtuve 160mH a causa de que el hilo que tenía era demasiado grueso (.25mm ó 1/100"), por lo que abandoné esa línea de investigación.
Continué dándole vueltas e informándome. Los núcleos toroidales (con forma de "donut", para que nos entendamos) tienen poquísimas "pérdidas" por lo que con muy pocas vueltas podría conseguir inductancias enormes. Lo malo es que bobinar "rosquillas" es trabajosísimo. Hay que hacerlo a mano. Así que me compré un núcleo toroidal grandecito para aliviar en lo posible este problema y usando el núcleo bobinado del inductor anterior me puse a fabricarlo. Para que no se me deshilachase en medio de la faena ya que tenía que estar todo el rato metiendo la bobinita por el agujeto del "donut", la sumergí en cera líquida, así la cosa era más controlable. Además, el hilo encerado se sujetaba mejor en el núcleo toroidal.
Me pasé una tarde bobina que te bobinarás y dí tres vueltas completas al toro. Cuando por fín decidí cortar el hilo para medir.... me había pasado un montón... medía 2.6H, esto es me había pasado en 2000mH!!!!. Total, que a deshacer lo hecho, como la famosa Penélope... Cruz no... la otra :-)
Con esto y con el pedal que tenía construí un prototipo que podéis ver aquí:
Si os fijáis bién en la foto veréis claramente el "donut" del que hablo, pero también veréis que están los 6 "botes" de los inductores. Pues bién, cuando probé el inductor casero con el resto del circuito es resultado fué estupendo. Me llevé un alegrón pues sonaba la mar de bien, pero la verdad, me asaltaba la duda de qué tal iría la cosa con los inductores comerciales en serie, así que me decidí y me los compré y los instalé en la placa de prototipos. Si os fijáis con más detenimiento, veréis que justo detrás del "bote" de la izquierda del todo hay un conmutador. Con él conseguía cambiar un inductor por los otros fácilmente y así se podían comparar sonidos. Fijáos en la siguiente foto donde se aprecia mejor:
Francamente, el resultado de los seis inductores comerciales en cadena era mejor. Me gustaba más cómo sonaba. Sin embargo no acabó ahí la cosa... aún sonando muy bién y mucho más "orgánico" que el wah de mi multiefectos Boss GT-3, había algo ahí que no acababa de cuadrar... era una chispita muy chillón, estridente y no me acababa de gustar.
Era hora de releerse otra vez The technology of Wah Pedals. Al poco ya tenía pistas pero me puse a buscar opiniones de usuarios. (casi) Todo el mundo está de acuerdo en que suenan mejor los wahs "VOX" que los "Crybaby", por citar los dos estándares del mercado. El artículo de R.G. Keen estaba basado en los CryBaby. Total que me puso a buscar esquemas como loco. Encontré este esquema del wah VOX. Fijáos que se indica que el inductor "debe" ser de 660mH. ¡Que casualidad!... los inductores aunque nominalmente eran de 100mH, una vez medidos daban unos 110mH, lo que hacía un total de 660mH exactamente. Sin embargo, en la estupenda página Wah Wah Mods se insinúa que los buenos son de 500mH, por lo que seguí mi búsqueda y me encontré con el siguiente esquema auténtico de wah-wah VOX de 1993 en el que se indica claramente que el inductor es del 500mH, al igual que en este esquema de wah-wah VOX de 1980 . Así que decidí quitar uno de los seis inductores y dejarlo en cinco, dando un total de aproximadamente 550mH. El resultado fué de lo mejor, ahora sí que sonaba el wah como tenía que sonar, muchísimo más "orgánico" y "vocal" que antes, más "gordo" y gruñon. ¡Espléndido!.
Decidí insistir con el "donut" casero quitándole vueltas. Al final quedó con un poco más de 3/4 partes del círculo recubierto de espiras y exactamente 550mH. También mejoró la cosa, pero los inductores comerciales seguían sonando mejor.
El núcleo toroidal de ferrita mide:
32mm de diametro, 14mm de altura y el agujero central es de 18mm de diámetro.
Al final no hacía falta ni siquiera una vuelta completa al toro. Usé el trocito de placa preperforada que véis para facilitar las conexiones al hilo.
Por cierto, si os decidís por los inductores comerciales hay algo que conviene que sepáis. Un inductor como ya os dije antes es una bobina y en este caso con un núcleo de ferrita. Pues bien, esa bobina está hecha con hilo de cobre fino y, como es lógico, tiene un principio y un final. En el exterior tiene dos terminales y es importante que sepáis que el principio del bobinado está marcado. Si os fijáis al lado de los terminales, cerca de uno de ellos habrá un pequeño punto en forma de rebaje en el relleno de resina. Ese punto indica el terminal conectado al principio de la bobina y os será muy útil para poder llevar un orden. Es importante que pongáis las bobinas en serie respetando este orden, así un terminal no marcado de una bobina continúa con el que sí está marcado en la siguiente. Así, el resultado final será un conjunto que forma una sóla bobina que a su vez también tendrá principio y fin. De este modo, el "punto" o principio de la primera bobina de la serie deberá estar conectada al punto de "más arriba" según miráis el esquema, esto es, el único lado conectado a la resistencia de 470K.
El proyecto ya estaba "a punto" para Piso-tones Ltd. con lo que me puse en contacto con Rubén para empezar el proyecto. Rubén se lo tomó con el entusiasmo habitual e hizo un diseño soberbio. Si íbamos a tener las tripas de un VOX, deberíamos tener un exterior similar. Como estábamos restringidos al pedal de expresión de plástico convencional no se podían hacer grandes virguerías, por lo que tuvo que tirar de mucho ingenio. A continuación el propio Rubén os relata lo que tuvo que hacer y os presenta el excelente resultado.
Mecanización del Tri-Wah por Rubén Hernández.
La verdad es que para mi sorpresa, el pedal Proel resultó ser mucho mejor de lo que esperaba. Al principio supuse que iba a ser muy frágil y que el recorrido del potenciómetro iba a ser inadecuado, sin embargo no fué así. El pedal es muy robusto y aguanta mucha tralla, sobre todo tras las modificaciones de Rubén y además el recorrido del pote es muy superior al de los VOX y Crybaby. Todo un hallazgo.
Bueno, supongo que a estas alturas, algún avezado lector estará pensando: Bueno... ¿y por qué lo de "Tri-Wah"?. La razón es muy simple y a la vez muy útil; son tres wahs en uno. Una vez conseguido que el circuito funcionase no sólo correctamente sino que además sonase muy bien, decidí ir un paso más allá y hacer caso a las sugerencias de R.G. Keen acerca de modificación de la respuesta y "barrido" del wah. Además de eso, cuando me llegó el pedal modificado por Rubén, me dí cuenta de que había un sitio "a huevo" para alojar lo que estaba pensando. Aquí lo podéis ver con su botoncillo de mando. Ni hecho a propósito podría quedar mejor:
Mi intención era dotar al wah de un conmutador giratorio de varias posiciones con las que poder conmutar el condensador de 10nF (0.01uF) de retorno desde el emisor del segundo y último transistor hasta el inductor para variar la respuesta del circuito. Evidentemente debería ser un conmutador que tuviese varias "posiciones" y que en la primera posición el wah quedase en modo "Standard". Aquí podéis ver como queda por dentro el pedal. Se parecia el conmutador en la zona de abajo.
Observad cómo quedó todo con el apantallado y como se colocó la serie de inductores. Por cierto, fijáos en la colocación de la pila. Creemos que estos pedales han sido diseñados para contener circuitos activos y el que la pila quepa *perfectamente* allí, no es una casualidad.
Volviendo al tema del conmutador, estuve haciendo pruebas y los resultados eran muy buenos, pero al poco me dí cuenta que si además y al mismo tiempo modificaba también el primer condensador de 10nF de la entrada, los resultados podrían ser mucho más espectaculares. El caso es que al final conseguí tres posiciones que me satisfacían mucho:
Posición "Wah": Sonido wah VOX standard.
Posición "Wih": Un sonido mucho más "funky" y chillón, muy bueno para acordes muteados de "sábado noche". ¿Os acordáis de "Shaft"?.
Posición "Woh": Un sonido mucho más grave y pesado. Se podría usar incluso con un bajo.
Durante algún tiempo, Rubén y yo nos estuvimos refiriendo al proyecto como "Wah-Wih-Woh" e incluso nos planteamos llamarle así, hasta que nos dimos cuenta de que era un nombre horrible, cursi y muy poco serio. Así que decidimos llamarle "Tri-Wah" que queda mucho mejor.
Por cierto, yo usé un conmutador giratorio de 4 circuitos tres posiciones, pero como no se usan más que dos circuitos podéis usar otros de la misma serie de cuatro o incluso de seis posiciones y así tener más modalidades. Como queráis.
Decidí incluir los diferentes condensadores en la placa final. Aún así había un problema que me tuvo bastante tiempo fastidiado. Cuando accionabas el conmutador para seleccionar un modelo u otro, se producía un chasquido fortísimo por el ampli a causa de la descarga instantánea de los condensadores que se seleccionaban. Despué de mucho investigar encontré la solución al problema: hay que poner en el conmutador entre el común de cada uno de los dos circuitos y cada uno de los terminales de los condensadores una resistencia de 4.7M (MegaOhmios). Es resultado es perfecto. No más chasquidos. Mucho ojo, no confundir con el sistema de las resistencias de "Pull-Down", que van a masa. Es como acabo de contar.
Hay otra opción que no he probado, pero debe funcionar y es la de comprar conmutadores "make after break", o "conmutación previa a la ruptura", como los conmutadores de 3 posiciones de las viejas Stratocasters. Quién sabe, a lo mejor encontráis también "posiciones intermedias" interesantes. Buscad en RS-Components por la referencia "320-219". Ese es el que usé yo, pero os pueden ser más útiles de otros tipos que allí veréis. Por ejemplo, el "Bipolar de 6 vías y conmutación antes de ruptura (327-658)". Seis posibilidades y quizá no hagan falta las resistencias de 4M7. Si alguien lo prueba, ¡que nos cuente qué tal!...
Conmutador giratorio
Al tiempo hice un diseño en placa de circuito impreso y gracias a nuestro colega "Totufo" conseguimos unas placas la mar de majas, aunque nuestros wahs están hechos en placa preperforada. El circuito es tán sencillo que no hay problemas en hacerlo así y cabe perfectamente.
Una cosa que deberéis tener en cuenta es que si usáis el pedal Proel propuesto, los dos jacks que trae son "mono", por lo que deberéis comprar uno análogo "Stereo" para realizar la conmutación de alimentación al pedal o bien sustituir los dos si no lo podéis encontrar con la misma pinta.
En cuanto al circuito impreso, aquí tenéis el resultado:
Fijáos abajo a la derecha que está el esquema del conmutador. Se obtienen las tres posiciones antes citadas y, quitando la primera que es la standard VOX, las otras dos son a mi gusto. Jugad con los condensadores para obtener otras respuestas. En el esquema, la posición 1 es "Wah", la 2 es "Wih" y la 3 es "Woh". Creo que queda claro a qué punto de la placa vá cada teminal del conmutador. Por cierto, prestad atención al dibujo del conmutador en la parte "SwA", pues los terminales 1 y 2 están permanentemente unidos eléctricamente entre sí.
¿Véis arriba a la derecha que pone "HAW"?. No es un saludo comanche, es "WAH" al revés, para indicaros de qué lado debéis poner la transparencia para que al final en el cobre quede escrito como es debido. También prestad atención al esquema del inductor. Viene reflejado el "punto" de comienzo de bobina que os contaba antes, justo entre las resistencias de 1K5 y 33K.
En cuanto a lo de "POT" y "POT. MED." se refiere a los terminales del potenciómetro. "POT. MED" significa "Terminal medio del pote". Si os fijáis en el esquema, uno de los terminales de los extremos va a masa y otro al circuito. Soldad uno a cada extremo y si os equivocáis y hace "AUW" en vez de "WAH" invertís los cables y ya está.
Para obtener el dibujo para transferir a la placa, pinchad en wah-pcb.bmp o bien en wah-ecopcb.bmp si queréis una versión para ahorrar "ácido" (¡ojo con los "cortos" entre pistas!). Ambas están creadas a 600 dpi, así que si las imprimís de ese modo quedarán a tamaño perfecto.
Aquí tenéis la lista de materiales necesaria para la contrucción del Tri-Wah.
Os recomiendo también la lectura de la página del wah de J.D. Sleep, así como esta estupenda página del wah en donde se cuentan muchísimas cosas de los wahs a lo largo de la historia.
También podéis visitar la página del wah de Guitarkit en donde encontraréis interesantes links e información y fotos de cómo retocar un wah para dejarlo a vuestro gusto. Hay también instrucciones para que modifiquéis un wah que ya tengáis y que no os guste por alguna razón y también un modo ingenioso (aunque feo) de que os fabriquéis el propio pedal con material de ferretería.
Por cierto, si os decidís a haceros el inductor... ¡ también cabe perfectamente!. Fijaos:
... ah!... si queréis ver al "Tri-Wah" junto al "auténtico" (cortesía de Lapsteel) pinchad aquí.
¿Queréis oirlo?:
Rubén de "Sábado Noche"
Rubén con su "Marianne" (Tele '52 Reissue)
Rubén con su "Marianne" cabreada
Posición "Woh" con un bajo
Modificando el Inductor
En la página The technology of Wah Pedals R.G. Keen indica que hay algo realmente "mágico" en los inductores originales de los primeros wahs y lo razona científicamente. Tras conseguir uno de esos pedales se propuso investigar el inductor y llegó a unas conclusiones muy interesantes. El inductor que llevaban esos pedales era "malo"... de mala calidad y barato lo que produjo un resultado asombroso. Leed los detalles concretos en su artículo pero en resumen se trata de que el propio inductor "distorsionaba" a causa de la mala calidad de sus componentes y producía un efecto de distorsión de armónicos pares que era lo que les daba ese sonido tan peculiar y deseable, ese efecto "Vocal y Orgánico" que todo el mundo parece estar buscando en un wah.
El diseño del circuito permitía que pasase corriente a través del inductor y debido a la característica magnética del núcleo del inductor, este llegaba a magnetizarse permanentemente con el tiempo, cosa que no debería haber hecho. Pues bien, a ese magnetismo permanente es lo único a lo que se puede achacar ese comportamiente extraño y deseable de estos inductores. Este es un caso de "accidente feliz".
R.G. Keen propone la idea de crear un magnetismo inducido a base de sustituir el inductor por un pequeño transformador en el cual el secundario es el inductor en sí y el primario es utilizado como "electroimán" para reproducir el efecto. Sugiere un modelo de transformador que venden en "Radio Shack" en USA.
El caso es que, digo yo.... si lo que se trata es de provocar un campo magnético en el inductor.... ¿por qué no hacerlo simplemente con un imán"?.
Pues bien, le propuse el truco a dos amiguetes de Fendermanía: a mi "socio" Rubén y al siempre solícito Lapsteel.
Rubén lo probó en su Tri-Wah de Piso-tones con una tira de imán de esas que se usan en las neveras para cerrar la puerta. Ya sabéis, esa tira "por metros" que va al rededor de toda la puerta de la nevera y asegura que esta quede bien cerrada. Me comentó que en efecto encontró diferencia en forma de una especie de saturación que no estaba muy seguro de que le gustase del todo... Tras darle al "coco" y probarlo yo mismo, me dí cuenta de que el problema estaba en la gran cantidad de campo magnético que se inducía a causa de la forma tan especial que tenían los inductores del Tri-Wah. Son cinco "botes" puestos en línea y Rubén usó una tira de imán de esa misma longitud pegada a lo largo de las partes de arriba de la cadena de inductores. Eso era demasiado pues el campo magnético permanente que aparecía en los inductores de los primeros wahs de VOX era muy pequeño, así que les envié una nota a los dos para que en vez de ese tipo de imán, probasen con esos imanes con forma de hoja que suelen dar de publicidad para pegar en las puertas de las neveras... ya sabéis, esos anuncios flexibles magnéticos de TelePizza y cosas por el estilo que tiene forma de hoja un poco gorda y que "pegan" bastante poco.
Yo hice la prueba y me gustó mucho, pero necesitaba más datos.
El caso es que Lapsteel hizo la prueba, pero no en un Tri-wah, sino en su VOX. Recortó un trocito con forma de moneda del mismo diámetro que el inductor e hizo un agujero en medio con un taladrador de hojas para que pasase la tuerca. Pinchad aquí para ver una foto de "Green-Fuz" (Green-Fuz) del circuito VOX donde se ve el inductor.
En mi opinión, el efecto es "asombroso"... pero no soy el único que lo dice. En las propias palabras de Lapsteel:
"Por fin he podido probar hoy lo del Wah con el imán. (...) Lo he puesto, después de estar un rato tocando para "hacer oreja" y la diferencia es sensacional. A mí no me distorsiona (bueno, algo más guarrillo sí que es), pero el pedal parece que tiene ahora el doble de recorrido y en todas las posiciones suena con más dinámica que antes, es como si le hubiera añadido un "enhancer". De hecho le he pegado el imán con pegamento de ése marca "Pritt" de pegar papeles y ahí se va a quedar mucho tiempo. ¿Por qué no lo traerán de serie?"
Bueno, chic@s... esta no es información estrictamente de Piso-tones, sino aplicable a todos los que tengáis un Wah, ya sea VOX, Crybaby etc... Probadlo en vuestros wahs; es algo que no cuesta dinero y, si no os gusta, lo quitáis y en paz. En el caso del Tri-Wah, usad una tira de esa misma "hoja" de imán puesta sobre "la cabeza" de los inductores e id jugando con el ancho hasta conseguir el sonido que más os guste, o, mejor aún, probad con el método que ha usado Rubén de recortar cinco redondelillos usando como plantilla una moneda de 1 céntimo de Euro. Estos redondeles se pegarán a las carcasas de los cinco imanes, pero si os gusta cómo suena, sugiero que hagáis como Lapsteel y los peguéis con algún adhesivo suave para evitar que se descoloquen con algún golpe o caída del Tri-Wah.
Estas son unas fotos de cómo Rubén lo hizo con su Tri-Wah PisoTones:
¡¡más fácil imposible!!
He podido comprobar que la polaridad magnética de estos imanes también influye. Si no obtenéis los resultados apetecidos, probad a darle la vuelta a los imanes. Yo lo he probado en dos Wahs y según el caso, el efecto es bastante notable. Es curioso, pero a la misma conclusión ha llegado el amigo "Totufo" en su estupendo artículo Modificación del Inductor de un CryBaby/VOX
Por último, si sois lo suficientemente aventureros como para haceros vuestro propio "pedal" en vez de usar el Proel u otro similar, visitad esta página en donde encontraréis tres métodos ingeniosísimos para que os la hagáis vosotros mismos sin demasiados problemas.
Para saber más:
"Wah-wah casero" en Guitarramanía
"Wah-wah casero" en Fendermanía
©Piso-tones Ltd. Calambres y Rubén Hernández | guitarristas.org
jimiric90
 non...
![]() non..
non.. non..
non..![]() non...
non... non...
![]() Quel mal de crâne.......
Quel mal de crâne.......
benoitxvii
Mal de crane?
Oh, desole
Il y a des gens qui ne parlent pas français; ben oui...
Moi aussi, j'aimerai...mais quand je trouve enfin des articles sur des sujets interessants
ben....je fais avec, sort mon dico quand....vu que je ne suis pas un pro de l'anglais et de l'espagnol, mais j'y arrive
Ah, ca , je m'em....bete un peu, oui
Il n'y a que l'allemand ou je suis allergique
Et ca m'ennuie bien, je loupe des tas de trucs....
A moins que ce soit le contenu qui pose probleme
La , ce n'est plus aux langues qu'il faut se mettre, c'est a l'electronique
La modif de circuit au pif, c'est pas genial, sauf coup de chance
Avec la meme chance que de trouver les 6 numeros au loto
Bon courage
- < Liste des sujets
- Charte
- 1
- 2